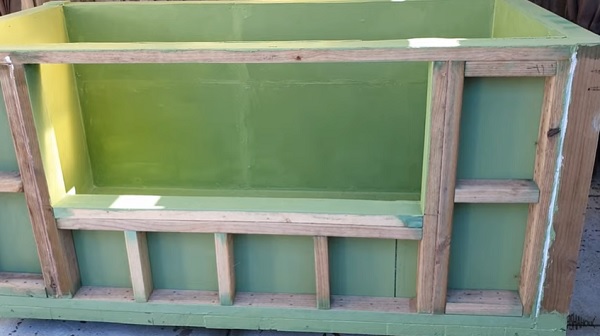
How to Waterproof and Insulate DIY Backyard Garden Pond:
It is fun to build a Backyard Garden Pond to let your family or guests see the fish. Ponds contain more water than aquariums so they are suitable for large fish. Fish are happier in ponds than aquariums, because there is lots of free space available for them.
This is the 2nd tutorial in the DIY Backyard Garden Pond series. It is about how to waterproof & insulate DIY Backyard Garden Pond. Have a look at the remaining tutorials of the DIY Garden Pond Series below:
- How to Make Backyard Garden Pond
- Wrapping and Painting Raised Fish Pond
- Installing Pond Liner and Taping The Folds
- How to Install Glass Window In Pond
Steps: How to Waterproof and Insulate DIY Backyard Pond:
Now in this tutorial, I have
waterproofed the interior of the pond to increase the life of the pond & I
have insulated the pond with Styrofoam because Melbourne weather is harsh. I
have waterproofed both sides to increase the life of the pond. Watch this video if you are interested in waterproofing & insulating Backyard Garden Pond:
Step 1: Buy Stuff from the Hardware Store:
The first step is to visit a Hardware
Store to buy the required stuff. I have purchased 8 – 10 x 40 mm Countersunk
Screws, 12 mm Marine Plywood, Timber Wood, Treated Pine Deck Boards, 40 x 40 mm
Dressed Pine, 250 x 300 mm Bracket, & Crommelin Liquid.
Step 2: Cut Plywood using a Jigsaw:
Just one piece of the plywood
could fit in the interior of the pond, & the rest I had to cut myself. It
is easy to avoid this problem by doing a web search about plywood, & build the
pond based on the available sizes of plywood.
Use a jigsaw to cut plywood
according to the required size. I have used Crommelin Liquid on both sides of
the plywood for reinforcing fabric.
Step 3: Attach Plywood to the inside of the Pond:
It is time to attach plywood to the
DIY Backyard Pond frame. Use screws to fix plywood to the inside of the pond
frame. I have used 12 mm marine plywood in the interior of the pond to offer toughness
to the pond & the pond will not be affected by moisture.
Step 4: Front Frame for Glass Window:
I have setup the front frame for
the glass window by attaching plywood to the inner side of the pond. The frame
I have built for the glass window seems nice.
Step 5: Waterproof the Pond:
It is time to waterproof the gaps
of plywood. I am using Crommelin Fabric which is used as moisture resistant on the
inner & outer sides of the pond to let the pond sustain moisture. Waterproofing
pond will extend its life.
Step 6: Pond Interior Window Frame:
For the Pond Interior Window
Frame, I am using 40 x 40 mm Dressed Pine Timber. I have added some timber on
the interior of the pond for fixing the glass. Glass window will allow my
family to see the fish.
Step 7: Corner Bracing:
For Corner Bracing, I am using a 250
x 300 mm bracket. I have fixed the bracket on the inner side of each corner of
the pond. Corner Bracing will make the pond stiff.
Step 8: Pond Exterior Window Frame:
I have cut the timber at 45
Degree, & I am using it at the exterior of the Pond Window Frame. I have
built a rectangular frame by using timber at each side.
Step 9: Styrofoam is used for Insulation:
I have cut Styrofoam using a hobby
knife & have added it to gaps between the pond frame. Styrofoam is used for
insulation of the pond because Melbourne weather is harsh. Quick change of temperature
can stress the fish so insulation will avoid this problem.
Step 10: Cover the Pond with Treated Pine Deck Boards:
I have covered the whole pond
including Styrofoam with Treated pine deck boards. Treated pine deck boards
seem beautiful & improve the overall beauty of the pond. In the next tutorial,
I am going to wrap & paint the DIY Backyard Garden Pond. Check it out


Post a Comment