How to build a cheap DIY Canister filter for fish tank at home:
Aquarium filters are very
expensive & they may not suit your tank size, especially, if you have a
large tank. Aquarists make filters at home that are according to their tank
specifications.
It is very easy to build a
homemade canister filter. A food container, vinyl tube, connectors, filter
media & a pump is required for it. A DIY canister filter must have an
intake & outtake hose, & it is very important to ensure that your
container is leak free. It is very easy to test if your container is airtight
or not. Just open the lid of the container & fill it with water. Then put
on the lid, invert the container & check if water is leaking or not. In
case it is leak free then you can use it for building a cheap canister filter.
Canister filters are normally designed for large aquariums but it can work with
small aquariums too. Use a low power submersible pump & a small container
if you want to make a canister filter for a small fish tank.
In this tutorial we will help you
in building a canister filter at home that suits your tank size & requirements.
Steps: How to make a homemade canister filter:
Choose a hose for intake. The hose should fit your pump head. When choosing a pump, it is important to choose one that is able to pump double as much water in an hour as the total water in your fish tank.
Watch video which shows how to
build a DIY canister filter:
I am using a plastic container
for building a DIY canister filter. 10mm vinyl tube can be used for inlet /
outlet hose. It will draw water containing fish waste, dirt, & other debris
to flow into the canister filter. An internal hose will take water to the
bottom of the filter. Then water will rise upward & hit mechanical &
biological media, & finally clean water will be pumped back to the
aquarium.
I am using elbow connectors for
making intake / outtake tubes just like the one that are used with canister
filters. I am using a vinyl joiner as an intake / outtake valve just like
canister filter inflow / outflow connectors. I drilled separate holes for inlet
/ outlet vinyl joiners & applied silicone glue for leak proof connections.
A pump is attached to the inward of the canister which creates a strong suction
force for drawing dirty water from the aquarium & pumping clean water back
to the aquarium. I have drilled a hole in the lid for the power cable of a
submersible pump, & have passed the wire through the hole. Glue is applied
to the wire to make it leak proof.
I am using coarse & fine
foams for mechanical filtration media along with Zeolite as bio media. Bio
media will allow heaps of beneficial bacteria to grow on its surface. Now take
a closer look at how I made this cheap DIY canister filter for betta aquarium.
Materials:
Materials used in making a
homemade canister filter:
- Food container
- 10mm Vinyl tube
- Vinyl tube joiner
- Elbow connectors
- Bio Media: Zeolite Bio Media
- Mechanical media: coarse & fine foam
- Submersible Pump
Step 1:
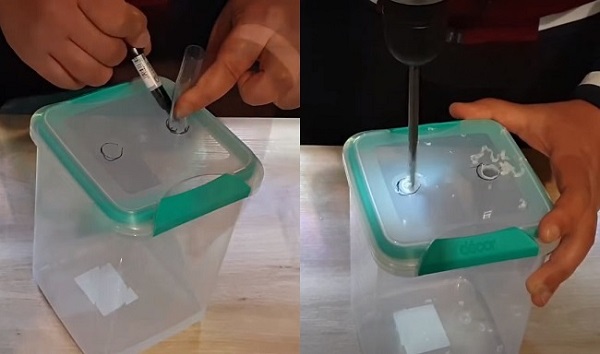
2 holes are marked for inflow
& outflow in the plastic container lid. Try not to hurt yourself while
using a drill machine & do not apply high pressure on the lid because it
could crack it. Use a sandpaper for smoothing rough edges.
Step 2:
I have cut a vinyl tube joiner in
half so that I can use it for both inflow / outflow connections.
Step 3:
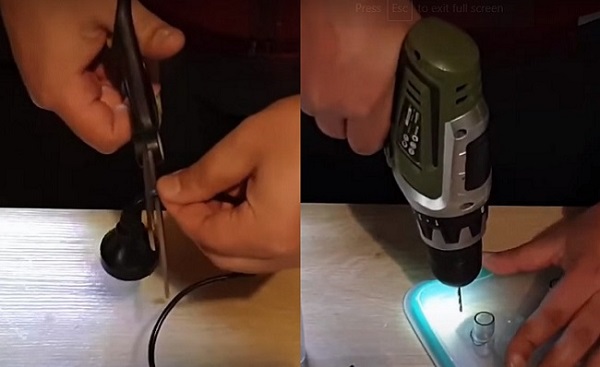
I am using a submersible pump for
driving the canister filter. Pump specs. are as follows: 4 watts (power), 280
L/H (water flow). Cut the power cable & drill a hole for the power cable in
the container lid.
Step 4:
Use sandpaper for smoothing rough
edges. Setup a submersible pump inside the food container & pass the wire
through the little hole. It is time to join the power cable.
Step 5:
Apply silicone glue for sealing
connections. Use glue on both the interior & exterior connections for
perfect sealing. Wait till the glue dries.
Step 6:
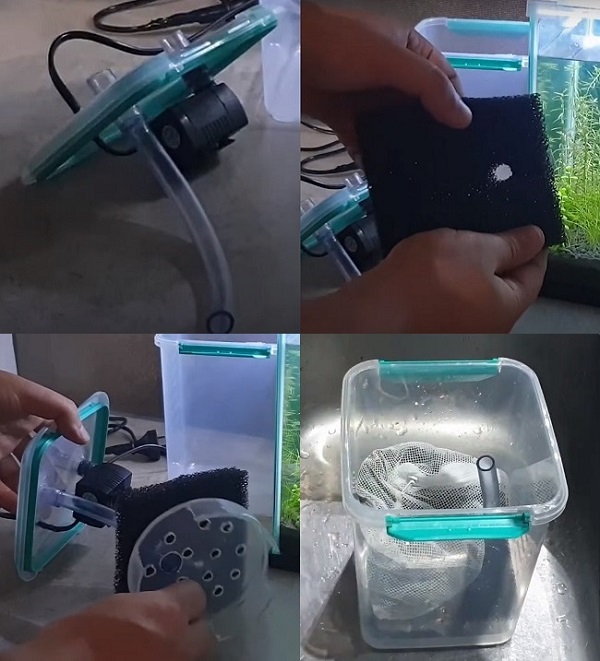
I have made a filter tray from a
damaged food container. Many holes are drilled in the tray so that water can
easily pass through them. I have drilled one large hole for the hose.
Step 7:
Cut a small hose & attach its
first end to the vinyl joiner & second end to the pump. Make hole in the
mechanical filtration media, & this internal hose should reach the bottom
of the container after passing through the tray.
Step 8:
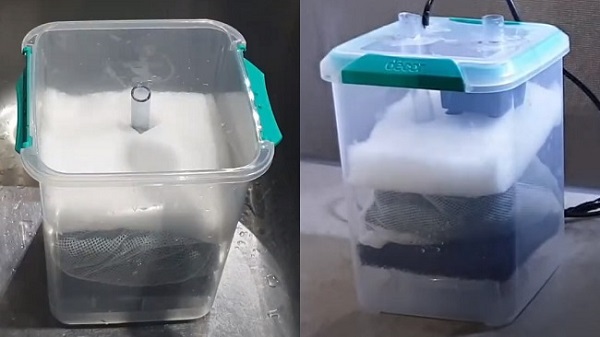
I am using coarse & fine
foams for trapping solid waste particles in the aquarium water. It is very
important to put bio media in between coarse & fine foams. Water rising
upward from the bottom should hit coarse foam first, then it will flow through
the bio media & fine foam.
Step 9:
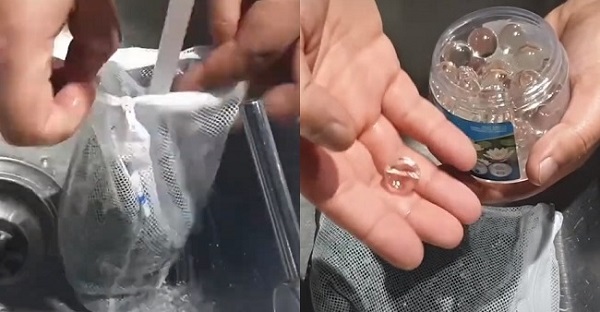
It is very important to wash the bio
media in aquarium water before using it in a filter. Rising will wash all the
dirt. New bio media will not hold beneficial bacteria. Either use a
cycled media from another established aquarium or use aquapro booster balls for
fast growth of good bacteria. Filter tray acts as a cover b/w submersible pump
& bio media.
Step 10:
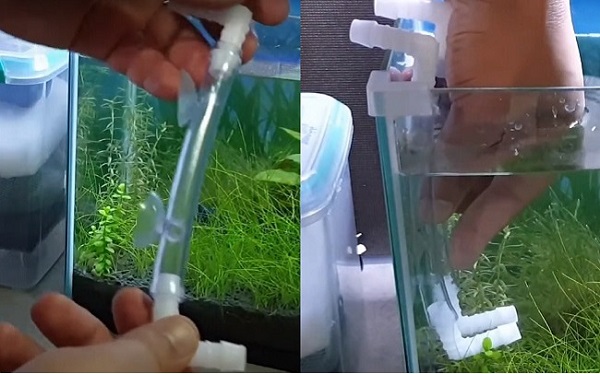
Use a hose for both inlet /
outlet hose. They should be fitted in a fish tank. Use 2 more hoses for
external connections. They should connect aquarium intake / outtake to filter
intake / outtake.
Step 11:
Elbow connectors should be joined
to aquarium intake / outtake hoses. Cut 2 holes both in the intake &
outtake hoses for suction cups. Connect both hoses to the tank wall. Use elbow
connectors on each side of both inflow / outflow aquarium hoses. The elbow
connectors should be connected on both sides of each hose in a way that it
forms a Z.
Step 12:
Attach filter outtake to the aquarium
output elbow connector, & filter inlet hose to the aquarium inlet elbow
connector. It will allow water to move between aquarium & filter. Fill
water in the canister filter before powering on the submersible pump. Air
bubbles will take some time in clearing up.
Zeolite Bio Media:
Zeolite provides lots of surface
for the growth of nitrifying bacteria. It will clean your aquarium efficiently,
as well as it will offer ion exchange capacity & will be able to chemically
stabilize the aquarium water. Other uses of Zeolite bio media include cleaning
waste water. It will wipe out turbidness in water & will remove toxic
metals.
Instructions:
When you run the filter for the
first time then it will gather fish poop & other debris. If you are using
new bio media then it will take time in cycling & storing useful bacteria.
After running the filter, good bacteria will start developing but it will take
some time until your filter contains heaps of useful bacteria. It is possible
to boost the growth of good bacteria by using aquapro booster balls because it
contains numerous good bacteria that slowly releases in the water & spreads
on the bio media. Another way is to add cycled media from an already
established tank that contains lots of useful bacteria. The advantage of good
bacteria is that it consumes organic byproduct of fish waste & clears your
aquarium water.
Conclusion:
Canister filters are the best
filters that are able to clean large volumes of water quickly & efficiently
than any other filter. Building canister filters do not need high resources
because you can convert household stuff into a canister filter. Homemade
canister filters are customizable & they suit your aquarium size.






Post a Comment